Basic & Intermediate Outdoor Climbing: 10. Direct Belay using an Auto-Block Device
Basic & Intermediate Outdoor Climbing
•
1m 10s
In this video we review how to belay a climber from above, directly off the anchor using an auto-block (or auto-locking) device. For more on the other two methods used to belay from above, see our video on “How to Belay from Above”.
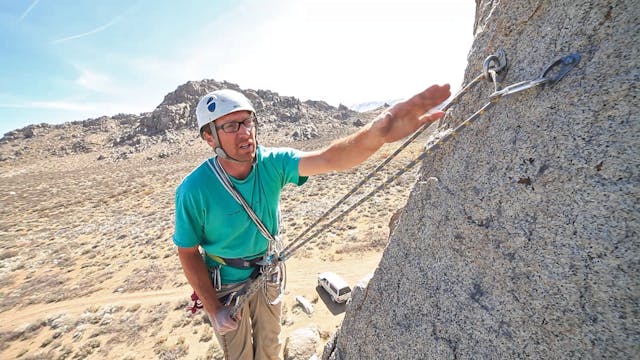
For this belay method, you will need a belay device specifically designed to be used in an auto-locking position, such as the Petzl Reverso or Black Diamond ATC-Guide. These both have additional clipping locations which allow you to hang the device off the anchor in an orientation that causes the climber’s rope to automatically lock the brake strand in the event of a fall.
Step 1: Attach the auto-block belay device to the anchor’s master point using a locking carabiner. Make sure to lock the carabiner.
Step 2: Take the climbers end of the rope, make a bight, and insert it through the auto-locking device’s opening so the rope runs parallel to the belay device cable. Keep the climber’s end of the rope on top as this is what locks the brake strand on bottom in the case of a fall.
Step 3: Use another locking carabiner to clip through both the rope AND the belay device cable, and make sure to lock the carabiner gate.
Step 4: Verify by pulling on the climber’s strand to make sure it locks in place, and then by belaying rope through the device by pulling the brake strand when the climber’s rope is unweighted.
Once your setup is complete, follow the verbal commands to begin belaying. See our video on verbal commands [hyperlink]. For a smooth belay, pull the climber’s strand up at the same time as you pull the brake strand to pull the slack through the belay device. While this device will lock automatically in the event of a fall, keep a hand on that brake strand at all times for assurance.
Important Note:
While an auto-locking device is the preferred method for belaying from above, there is one major drawback: When the climber weights the rope, it is impossible to feed out slack without some level of shenanigans. This means if the climber is hanging in mid air, having fallen mid crux on a steep climb, they are marooned without more advanced belaying techniques.
As such the belayer needs to know how to properly lower or give slack with each manufacturer’s auto-locking device. Otherwise, the belayer runs the risk of injuring or dropping the climber by giving too much slack too quickly. Several of the top gear manufactures - e.g. Black Diamond, Petzl, Mammut, DMM - offer auto-locking belay devices. Some of these even have figured out ways to work around this problem. Get to know your belay device well (as well as your climbing partner’s device!) and practice in a low-consequence setting before using it on a climb. Better yet, get your rock self-rescue skills dialed so you can escape the belay.
Remember, the belayer should be anchored into the anchor any time the belayer is belaying from above.
We hope you found this video helpful. Feel free to comment below with questions or thoughts!
Please remember, climbing is inherently dangerous. Climb at your own risk.
Up Next in Basic & Intermediate Outdoor Climbing
-
Basic & Intermediate Outdoor Climbing...
In this video we review how to tie a “double overhand knot” or “stopper knot” to help prevent the rope end from dangerously slipping through the belay device and/or rappel device. Including a stopper knot at the end of the rope helps to “close the system”.
Step 1 - Towards the end of the rope,...
-
Basic & Intermediate Outdoor Climbing...
In this video we review two ways to back up a belay device for a rappel.
Backing up the belay device using the rope above the device:
Step 1: Using the Sterling HollowBlock (or, in a pinch, a small loop of cordelette), tie the auto block friction hitch above the rappel device by wrapping th...
-
Basic & Intermediate Outdoor Climbing...
In this video we review how to clean a top rope anchor and rappel back to the ground when you have finished climbing a route. For this, you must have a proper rappel station with rings at the top of the climb. If not, be prepared to leave gear behind.
Step 1: Properly secure yourself into the ...


