Basic & Intermediate Outdoor Climbing: 12. How to Back up the Rappel
Basic & Intermediate Outdoor Climbing
•
2m 46s
In this video we review two ways to back up a belay device for a rappel.
Backing up the belay device using the rope above the device:
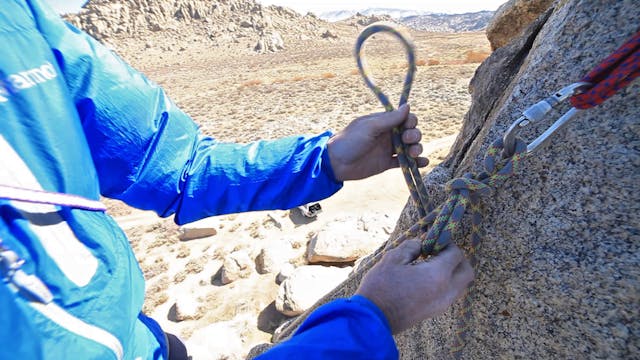
Step 1: Using the Sterling HollowBlock (or, in a pinch, a small loop of cordelette), tie the auto block friction hitch above the rappel device by wrapping the sling around both ropes at least three times--more wraps means more friction.
NOTE: you can use several hitches for this purpose, listed in order of increasing bite strength: auto block, klemheist, prussik.
IMPORTANT NOTE: The video shows the most preferred material currently offered for use as an auto block. The HollowBlock, from Sterling Rope, is a hollow, braided loop of aramid fibers which has impeccable grip and is heat resistant. Traditional accessory climbing cord can be more difficult to “dress” properly for a firm grip, and is not heat resistant like the aramid fibers. This has myriad implications for safety, and while we are not endorsed by Sterling, we very highly recommend their product. We include cordelette as an option here only so you know you can use cord in a pinch if you forgot your HollowBlock. Seriously, get one.
ANOTHER IMPORTANT NOTE: Never use lightweight sewn slings for this purpose.
Dyneema, which is white in color, is not heat resistant and is even more quickly damaged by heat than traditional accessory cord. It’s also really slippery.
Step 2: Connect a locking carabiner to your friction hitch.
Step 3: Extend the backup by clipping another locking carabiner to your belay loop, and using a sling to connect it to the friction hitch.
Alternatively, you can use a longer loop of cord which reaches your belay device. In this case, it must be tied with a prussik hitch instead of the auto block hitch. This method can be useful in rescue drills as it can facilitate transitions into climbing back up the rope.
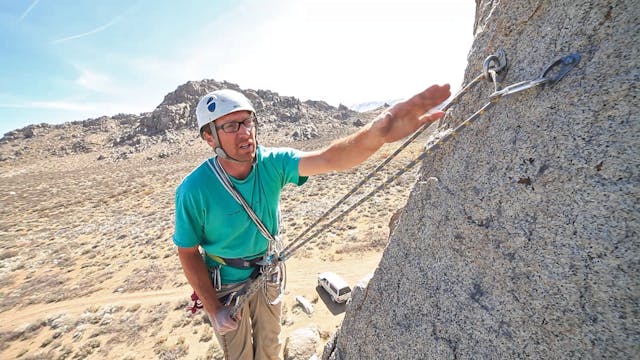
Step 4: To rappel, place one hand on top of the friction hitch to manage it while rappelling. Do not toggle the hitch open by fully gripping it with your hand; instead, tap the top of it with two fingers until it just slides with you. This will help ensure the hitch stays properly dressed and ready to grab the rope in the case of a surprise slip as you’re rappelling.
NOTE: This is NOT considered a hands free backup. If the climber loses control of the brake strands, their weight will rest entirely on the friction hitch--and if the friction hitch fails, the climber would continue to fall.
Backing up the belay device using the rope below the device:
Step 1: Using a HollowBlock or loop of cordelette, create a friction hitch (usually the auto block hitch) below the belay device.
NOTE: You may also choose to extend the belay device using a nylon sling so the device is further above your harness. This helps keep the backup separated from the belay device, especially useful in wandering or long rappels where you may need your hands free to manage the rope below you. If the auto block bumps up next to the belay device, it will automatically unlock, so this separation can offer a significant margin of safety, especially while managing tangled ropes or a tricky rappel.
Step 2: Connect a locking carabiner to your friction hitch and clip it to your leg loop.
Step 3: To rappel, place one hand on top of the friction hitch to manage it while rappelling. Do not toggle the hitch open by fully gripping it with your hand; instead, tap the top of it with two fingers until it just slides with you. This will help ensure the hitch stays properly dressed and ready to grab the rope in the case of a surprise slip as you’re rappelling.
This is considered a hands free backup because if the person rappelling loses control of the brake strands, their the weight comes first on the belay device, and the backup holds the brake strands in the braking position, as if the hand were still there.
We hope you found this video helpful. Feel free to comment below with questions or thoughts!
Please remember, climbing is inherently dangerous. Climb at your own risk.
Up Next in Basic & Intermediate Outdoor Climbing
-
Basic & Intermediate Outdoor Climbing...
In this video we review how to clean a top rope anchor and rappel back to the ground when you have finished climbing a route. For this, you must have a proper rappel station with rings at the top of the climb. If not, be prepared to leave gear behind.
Step 1: Properly secure yourself into the ...
-
Basic & Intermediate Outdoor Climbing...
In this video we review how to tie the munter hitch, and then tie it off with the munter mule knot. A munter hitch can be used as a belay, in the case of a forgotten or dropped belay device. The mule is a way to tie off the munter to go hands free, fixing the line in place.
Step 1: Clip a lock...
-
Basic & Intermediate Outdoor Climbing...
In this video we review how to coil the rope using a butterfly coil. This is a great coil for carrying the rope like a backpack and is very useful when walking down from a multi pitch climb or walking off the top of a crag after top-roping.
Step 1: Line up both ends of the rope and measure two...


