Aid Climbing: 15. How to Pendulum & Lower Out While Cleaning
Aid Climbing & Big Walls
•
3m 39s
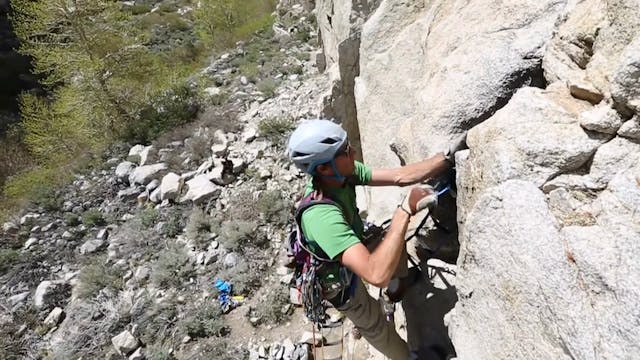
In this video we look at how to pendulum and lower out when cleaning a pitch of aid. When the follower encounters a pendulum, there are a few ways to accomplish this technical move. We will show you our most commonly used technique.
Be sure to practice this technique at your local crag—and not for the first time when you are thousands of feet off the deck!
Let’s outline this step-by-step:
Step 1: Approach the pendulum point, which is usually a fixed piece gear such as a piton (“pin”), and will contain either a carabiner or a piece of “tat” (left cord or webbing). If you don’t like what is there to lower from, now is the time to make it something you trust—back it up with your extra webbing, or a leave a carabiner.
Step 2: Pull a bight of rope up from your tie in point.
Step 3: Feed the bight through the tat or carabiner and clip this bight into a locking carabiner attached to your belay loop. Lock the carabiner.
Step 4: Ratchet yourself toward the fixed piece using the pulley system you just built on your harness. Your tie in point should be taught. Hold yourself in place once you are close to the pendulum point and you have slackened the lead line.
DO NOT LET GO of this ratcheting rope system running from your belay loop through the pendulum point—this is now essentially your belay.
Note at this point you can clip into the fixed piece
Step 5: The lead line should now have slack in it so you can pass the piece with the top jumar and remove the gear from the rock, leaving only the fixed piece and the item which you are lowering from.
Step 6: Cinch up the top jumar to get as tight as you can on the rope above you, then slowly, with a firm grip on the pendulum line, start to lower yourself out.
Step 7: Once you are hanging vertically again, your weight should be back on your jumars. Unclip the bight of rope from the locking biner on your belay loop, and pull that loop out of the pendulum by pulling from your tie in.
Advanced Trick:
Sometimes the pendulum is too far, or it is early on the pitch so the length of rope you have below your tie in is not enough to make it across. If that is the case, there is an advanced trick which involves untying from the rope—so be doubly sure you are adequately backed up.
Step 1: Approach the ‘pendi’ (pendulum) point.
Step 2: Tie a “figure-eight-on-a-bight” beneath your lowest jumar, and clip that to your belay loop with a locking carabiner. This is now your main connection point to the rope.
Step 3: Untie from the lead line.
Step 4: Take the tail of the rope and thread it through the pendulum point. Pull the rope through until it is tight on your figure-eight-on-a-bight, which is clipped to your harness.
Step 5: Put the rope behind the pendulum point (which you just threaded through) into a belay device, and then cinch yourself closer to the pendulum point.
Step 6: The rope above you should now be slack, so you can pass the piece, retrieve any of your gear, and cinch the top jumar as high as possible above you.
Step 6: Keep a firm grip on the brake strand and lower yourself, as if you were lowering someone on top-rope from that pendulum point — but that someone getting lowered is also you!
With this method, you have more rope available (up to the end of the rope) to lower yourself out.
Step 7: Once your weight is on your jumars again, you can unclip the rope from your belay device and pull the end through the pendulum point.
Step 8: Once you have retrieved the end of the rope, tie back into the end of the rope and then unclip and untie the figure-eight-on-a-bight. Remember to keep tying backup knots when you have 10-20 feet of slack in the rope below you.
Now you can continue cleaning the pitch.
These are essential techniques to any Big Wall or Aid Climbing adventure. Be sure to practice and have a working knowledge of these systems before venturing onward.
We hope you found this video helpful. Feel free to comment below with questions or thoughts!
Please remember, climbing is inherently dangerous. Climb at your own risk.
Up Next in Aid Climbing & Big Walls
-
Aid Climbing: 16. Aid Climb Like You ...
In this video we discuss the benefits of integrating free climbing into your aid climbing. If your climb has hand a foot holds, it can be much more efficient to break free of your aid climbing rhythm, and use those natural rock holds to help you step up to the top step of your aiders. Use hand ja...
-
Aid Climbing: 17. Lead Ropes & Haul L...
In this video we continue our discussion of the gear necessary for aid and big wall climbing.
- Dynamic Lead Line - 60 meters is standard, but some routes may require 70 meter rope. Check the topo or ask other climbers for beta.
- Static Line or Dynamic Line - Used for hauling. A static lin...
-
Aid Climbing: 19. Offset Placements -...
On aid climbs and big walls, offset nuts are an indispensable tool that turn otherwise unprotectable seams or incipient cracks into a reasonable climb. In this video, we look at the benefits of offset nuts, and the pros and cons of softer metals used in some sets.
Offset nuts, unlike standard ...


